


Most people judge a villa interior by what they see on handover day: the marble, the paint, the light. What they don’t see is the electrical work that decides whether that light looks right. A track light sits straight because a channel was cut straight months earlier. A wall looks clean because someone planned where the distribution board would hide.
We are Premier Heights Dubai, and we have been working in Dubai since 2008. The photos below come from the electrical side of villa interior work, taken before and after. They show what good villa lighting design needs long before the first lamp switches on.
Table of Contents
Why villa lighting design in Dubai starts with the cables
Villa lighting design is usually discussed in terms of mood and fixtures. On site, it starts with the first fix: where the cables run, where the boxes sit, and which circuit feeds which light. Get that stage wrong and no fixture can save it. You end up with a downlight a few centimetres off the line of the ceiling, or a socket that lands behind the sofa.
Dubai villas add their own pressure. Ceilings are often high, rooms open onto large glazed walls, and many homes use layered lighting: linear tracks, spotlights, downlights and step lights, each on its own control. Good villa lighting design gives every layer its own cable run and its own place on the board. The work also has to meet the electrical rules of DEWA, the Dubai Electricity and Water Authority, before the power goes on.
The distribution board: from a bundle of cables to a white door
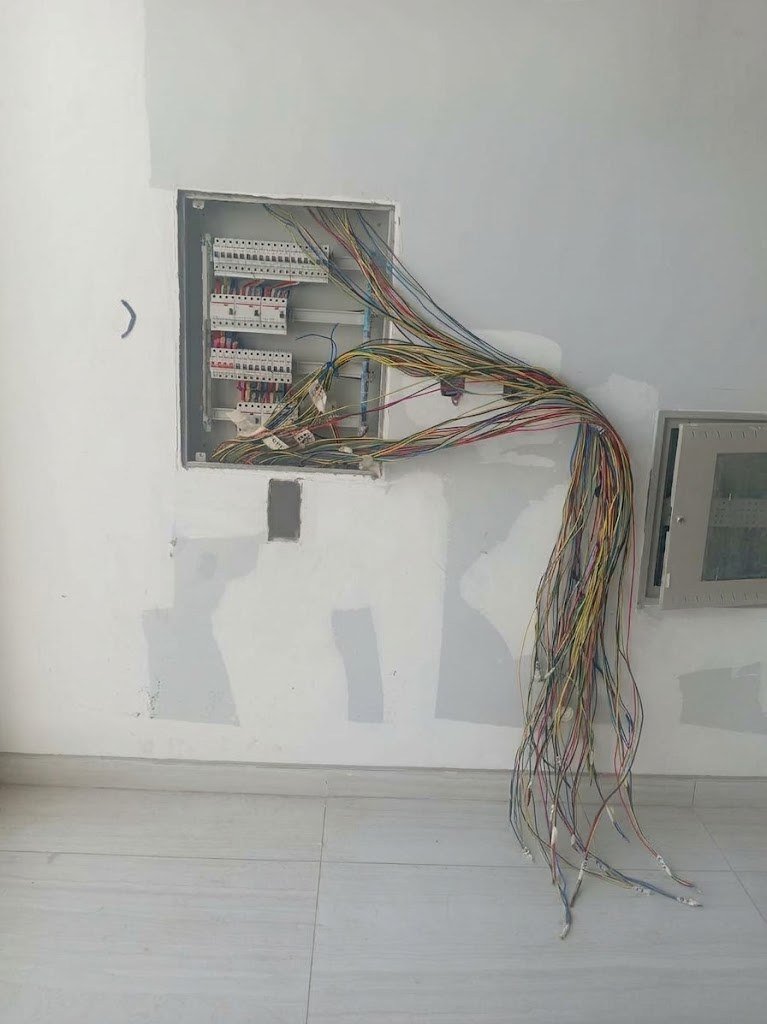
The first photo shows the distribution board during first fix. Dozens of colour-coded cables spill out of the enclosure and hang to the floor, many of them tagged with labels. It looks messy, but it is normal. Every light, socket and appliance in the villa ends up on one of those breakers, so the board has to be planned before the walls are finished.
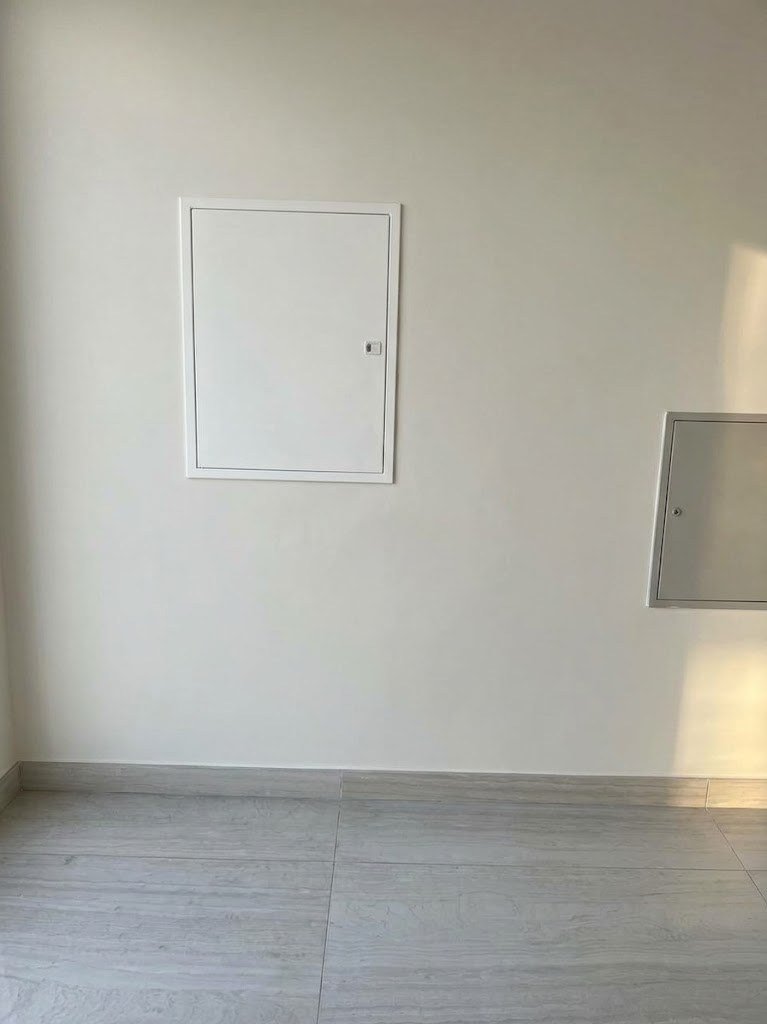
The second photo is the same wall at handover. The board sits behind a flush white door, the wall is painted, and the floor tiles and skirting are done. The second panel on the right has a matching door of its own. Nothing tells you how much wiring is behind them, and that is the point.
If you are planning a villa interior, ask early where the board will go. A board in a utility room or a quiet corridor is easier to hide than one in a living area.
Sockets: three back boxes, three finished outlets
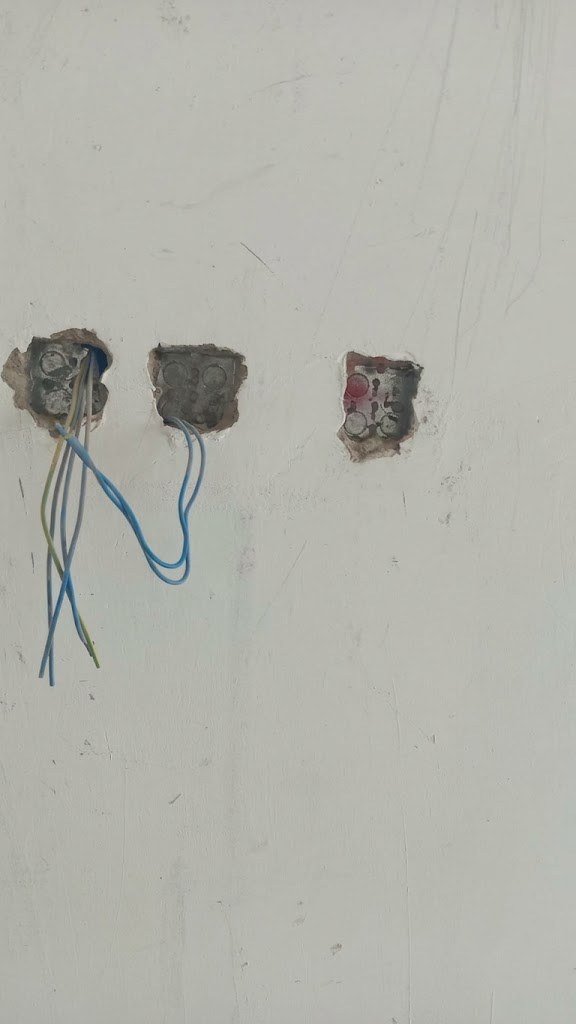
Here is a short run of three socket back boxes set into the wall, with cables pulled through. At this stage the positions are fixed. Moving a box later means cutting the wall again.
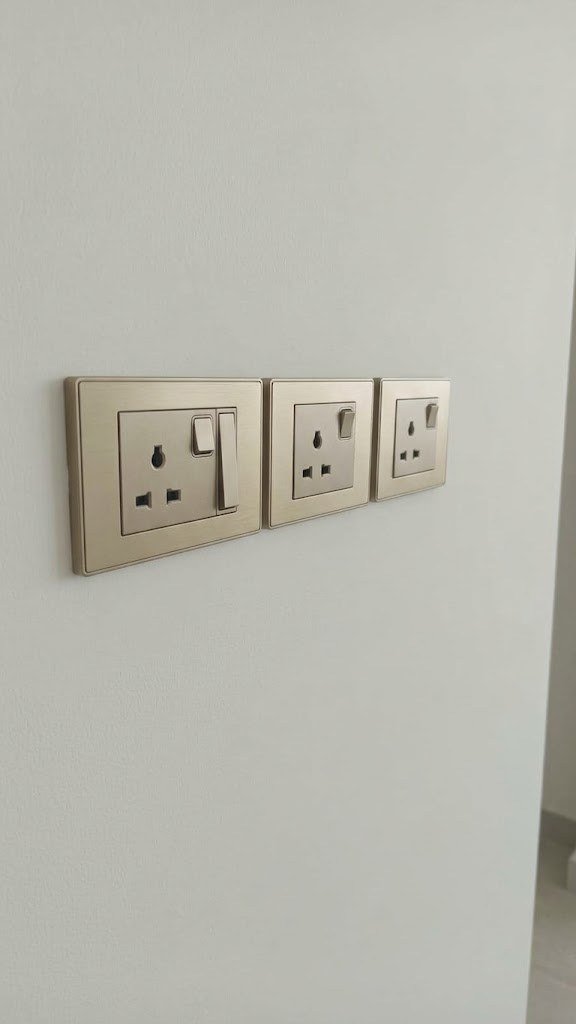
Once the wall is finished, the same spot holds three switched sockets in a brushed gold finish, with the first one on a wider plate. Small choices like plate colour are part of villa lighting design too, and they change how a room feels. A gold finish ties the sockets in with handles and light fittings, where plain white plastic can look like an afterthought in a luxury villa interior.
The ceiling: track channels before the lights go in
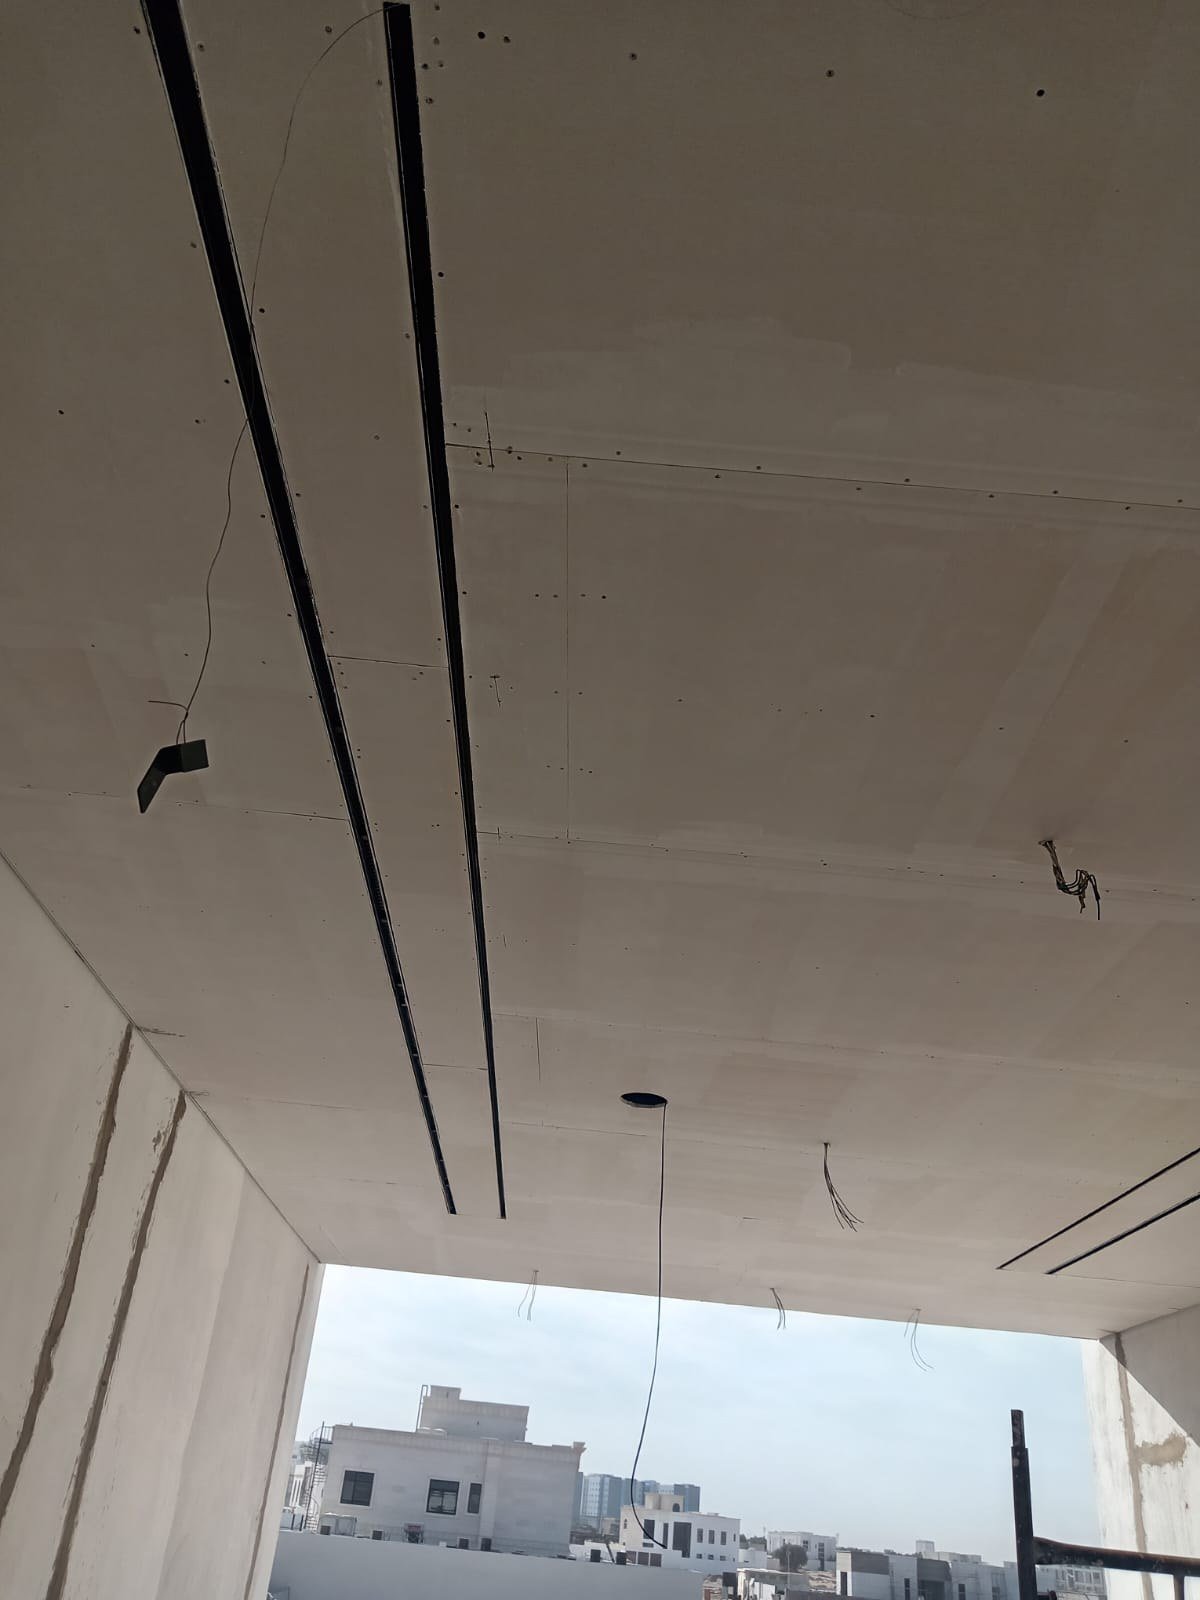
In the before photo, the plasterboard ceiling is still unpainted. Two long channels run across it for linear track lights, with another pair at the far right. Cable tails hang where spotlights and downlights will go, and a round cut-out for a downlight is already in place.
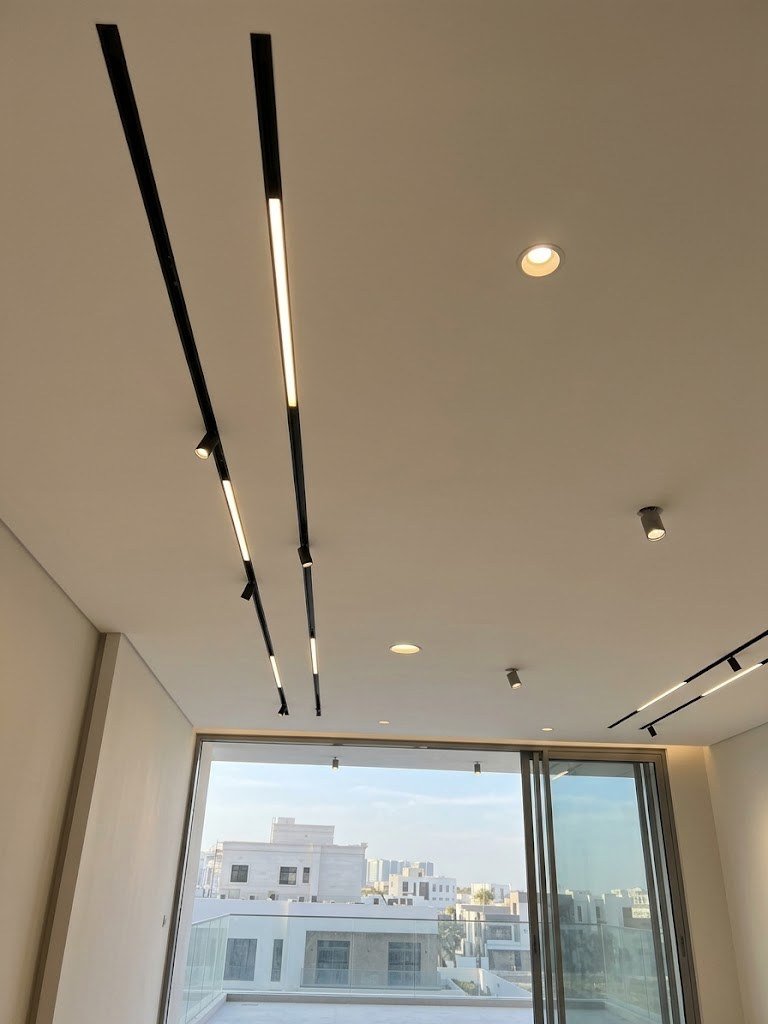
The after photo shows the same room. Both tracks now carry linear LED sections and adjustable spotlights. Round downlights and surface-mounted spotlights sit in the open ceiling, and the light washes towards the large sliding glass doors to the balcony.
In villa lighting design, tracks like these only look clean when the channels are straight and the ceiling around them is flat. There is little room for error, so the tracks are planned with the ceiling, not added after it.
Staircase lighting: from light points to a design idea
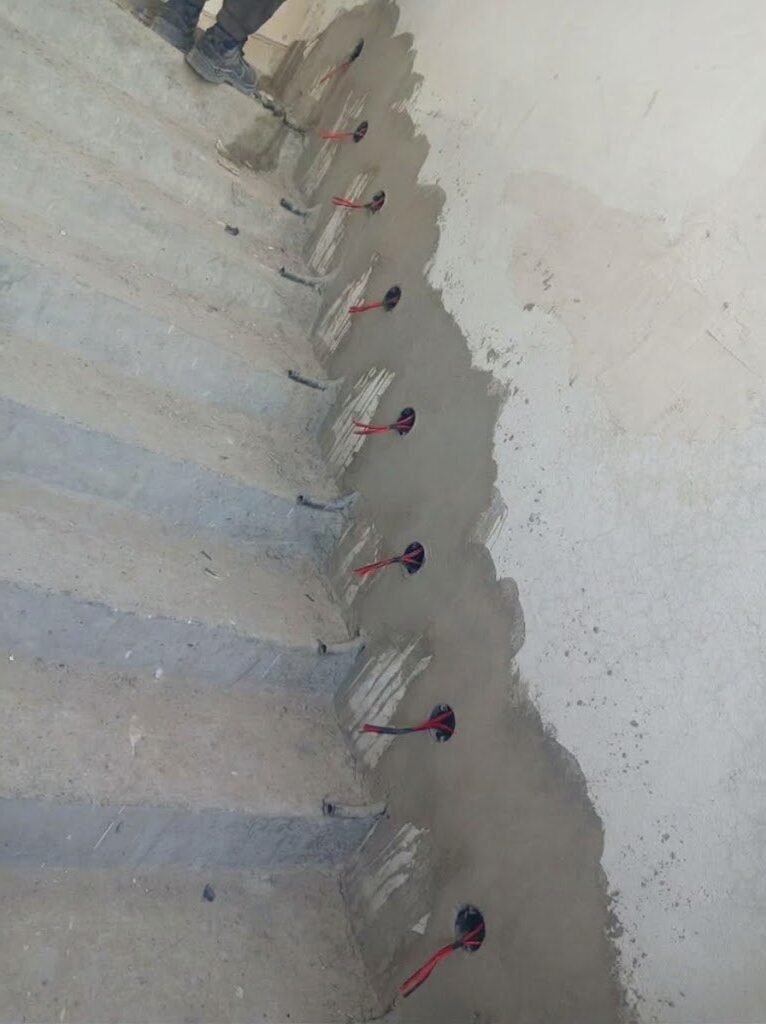
The last before photo shows a staircase wall in raw concrete. A neat row of round boxes follows the slope of the stairs, each with a red cable. These are points for low-level step lights, set at a steady height above the treads. Step lights are one of the quieter parts of villa lighting design, but they make the stairs safer at night.
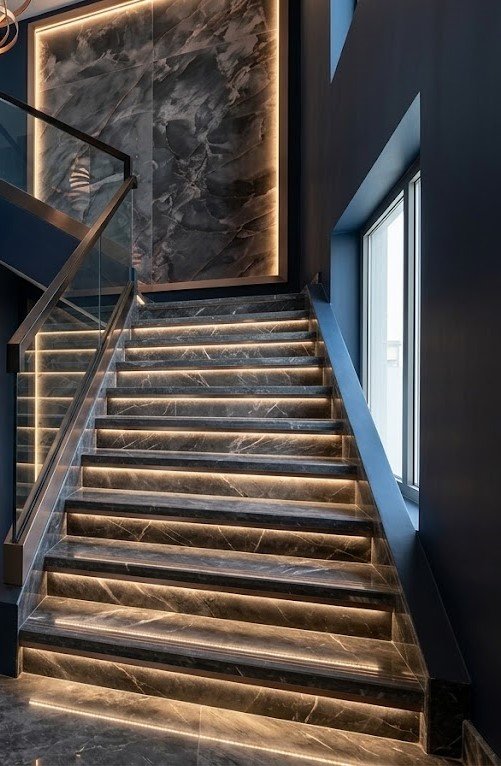
The image beside it is a design concept, not a photo of a finished job. It shows how a staircase with this kind of lighting can look, with small round wall lights along the lower flight and LED strips under each marble tread. We label it as a concept, but it is not a far-off idea. Starting from first-fix points like the ones above, the Premier Heights Dubai team can turn a design like this into a finished staircase.
What we have learned from villa electrical works
- Fix the furniture plan before first fix. Sockets, switches and floor points follow the furniture, not the other way round.
- Choose your fittings early. Track systems, recessed downlights and step lights each need different boxes, depths and drivers, so settle your villa lighting design before first fix.
- Keep each lighting layer on its own circuit, so you can dim or switch it separately.
- Check every point against the drawings before walls and ceilings close. Moving a box is cheap. Cutting a finished ceiling is not.
- Pick plates and visible fittings with the interior finishes, not after them.
Villa lighting design FAQs
When should villa lighting design be planned?
Before first fix, once the furniture layout and the light fittings are chosen. After the walls and ceilings are closed, moving a light point means cutting finished surfaces.
What are first fix and second fix in electrical work?
First fix is when cables, conduits and back boxes go in, before plaster, ceilings and paint. Second fix comes after the finishes, when sockets, switches and light fittings are mounted and connected.
Does villa electrical work in Dubai need DEWA approval?
Electrical work in Dubai has to follow DEWA regulations. The approvals your villa needs depend on the scope of work, so confirm them with your contractor before work starts.
Can Premier Heights Dubai build a lighting concept like the staircase above?
Yes. Our team handles the electrical work from first fix to handover, so a concept like the staircase above can become a finished space in your villa.
Planning your villa interior
Good villa lighting design is part creative work and part site work. The design sets the mood. The electrical work decides whether that design survives real walls and ceilings.
If you are planning a villa interior and want your villa lighting design and electrical work handled together, take a look at our villa interior design services in Dubai, or contact Premier Heights Dubai to talk through your plans.